
WebDAV Client Setting
Click [WebDAV Setting] - [WebDAV Client Setting] in the [Network] tab to display this screen.
The setting contents are the same as those accessed by selecting [Network Setting] - [NIC Setting] - [WebDAV Setting] - [WebDAV Client Setting] in Administrator Setting.
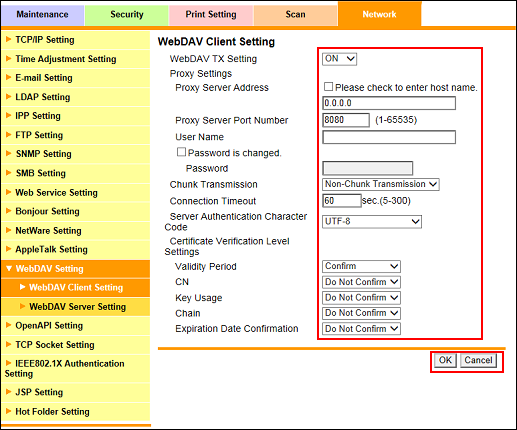
Select either [ON] or [OFF] from the [WebDAV TX Setting] drop-down list.
Enter [Proxy Server Address]. To enter the host name, select the [Please check to enter host name.] check box.
Enter [Proxy Server Port Number].
Enter [User Name].
Enter [Password]. If a password has already been set, [Password is currently set] is displayed. To change the password, select the [Password is changed.] checkbox, and enter a new password.
Select either [Non-Chunk Transmission] or [Chunk Transmission] from the [Chunk Transmission] drop-down list.
Enter [Connection Timeout].
Select either [UTF-8] or [Windows Code Page] from the [Server Authentication Character Code] drop-down list.
Select a desired option from the drop-down lists provided for each setting item under [Certificate Verification Level Settings].
Click [OK]. Clicking [Cancel] cancels the setting.
Click [OK] on the setting complete screen.
If you have changed any setting, turn the machine power off then on.