
Account Track Registration
Click [Account Track Registration] in the [Security] tab to display this screen.
When [Account Track] is set to [OFF], the following screen is displayed.
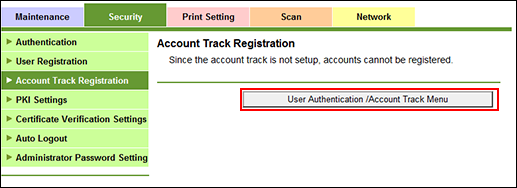
Click [User Authentication /Account Track Menu] to display the User Auth/Account Track Screen. To register an account for account track, specify [ON] for [Account Track].
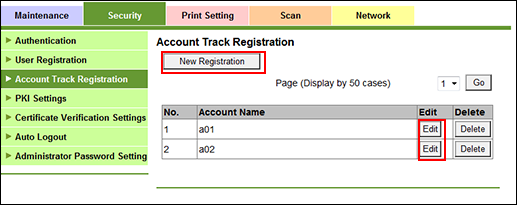
You can register or delete an account for account track.
Account track registration
Click [New Registration] to register a new account, or click [Edit] for a desired account name to edit the data already registered.
To display the registration list of the selected range, select a range of numbers from the [Page (Display by 50 cases)] drop-down list, and click [Go].
Enter the registration number.
The available range is 1 to 1000.
If you are editing, the registration number for the selected account name is displayed. You cannot enter the value.
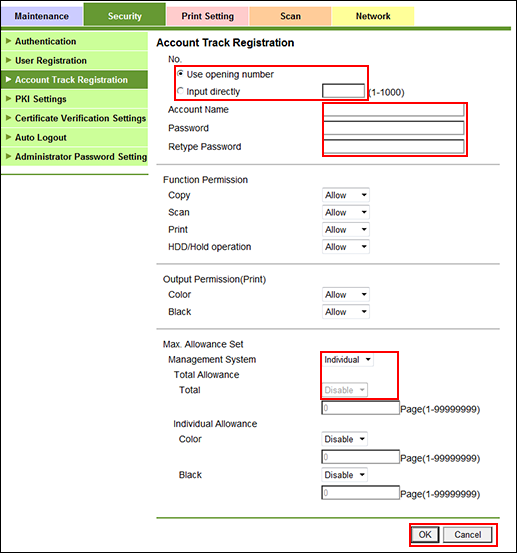
Enter the account name.
Up to 8 one-byte characters can be used.
If the [account track authentication method] in [Authentication Setting] is set to [Password Only], this item is dimmed.
Enter the password.
Up to 8 one-byte characters can be used. Enter the same password for [Retype Password].
Select the functions to be available and the maximum allowed for printing for the registered account.
Maximum must be specified after selecting [Enable] from the [Max. Allowance Set] drop-down menu.
Click [OK]. Clicking [Cancel] cancels the setting.
Click [OK] on the setting complete screen.
To delete an account
Click [Delete] for an account to be deleted.
Click [OK] on the confirmation screen. Click [Cancel] to cancel the deletion.
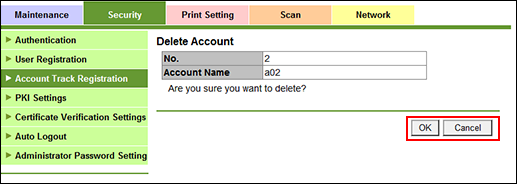
Click [OK] on the setting complete screen.