
Saving/Recalling a Job in/from HDD on the Main Body
Saving in the HDD (Hold Job -> HDD Saved Job)
You can save a hold job as a HDD saved job on the touch panel of the main body.
This section describes an example of creating and saving to a folder at the time of saving a job in the HDD.

The original hold job remains as is even after it is saved in the HDD. Delete unnecessary hold jobs if any.
Press the [JOB LIST] tab, then press [Hold Job].
The [Hold Job] screen will be displayed.
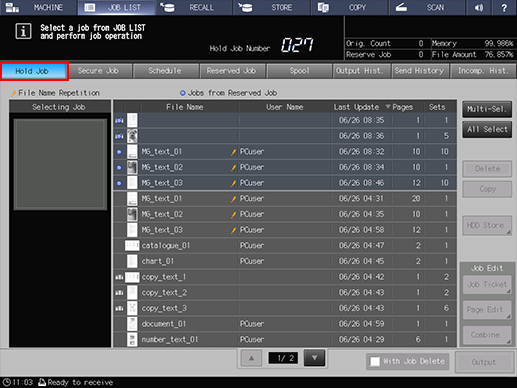
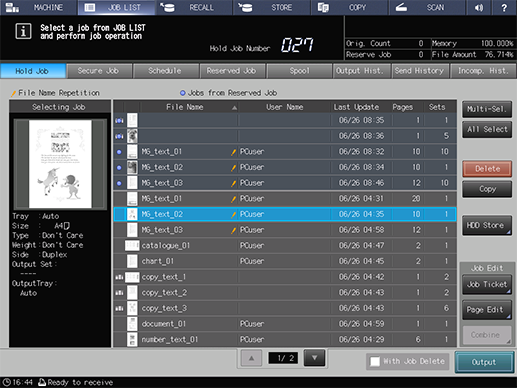
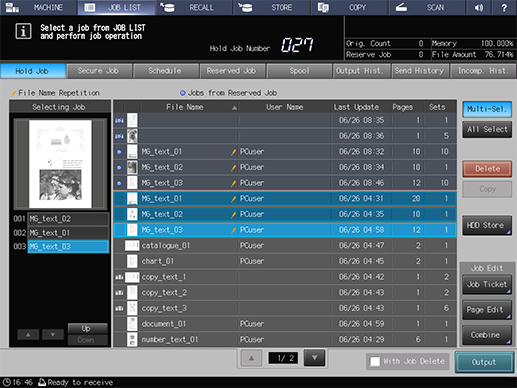
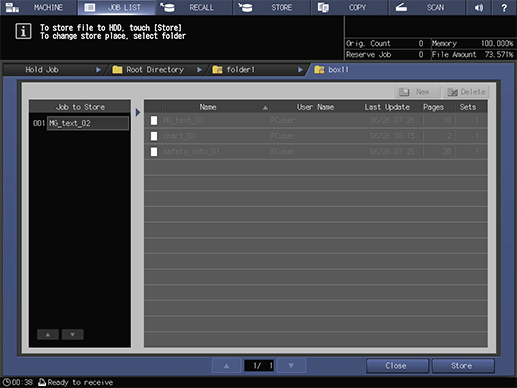
Select a single job or multiple jobs to be saved on the HDD.
If the desired job is not found on the list, press [
 ] or [
 ] to display that job.
Pressing each title in the title row will sort the list in selected order.
For details about the icons displayed in the list, refer to Hold Job screen.
Press [Multi-Sel.] first to select multiple jobs.
Press [All Select] to select all jobs on the list. Pressing this key selects all jobs on the list, but [Multi-Sel.] appears highlighted instead.
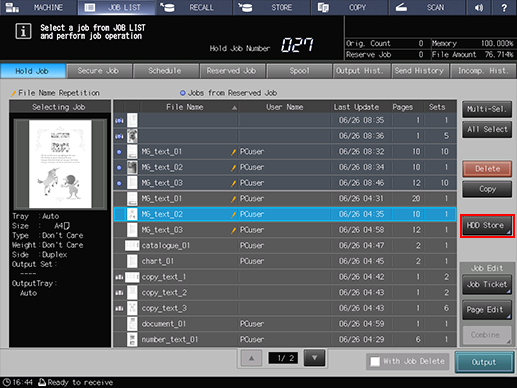
Press [Store on HDD].
Specify the location to store an HDD saved job.
In the [Root Directory] screen, specify the location to store an HDD saved job.
For details on how to specify the storage location, refer to Preparing a folder or user box.
Press [Store].
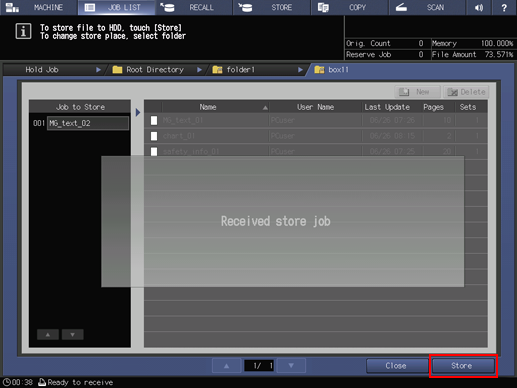
When [Received store job] is displayed, press [Close]. The specified hold job is saved as a HDD saved job.
Recalling a HDD Saved Job (HDD Saved Job -> Hold Job)
You can recall HDD saved jobs to save (copy) them as hold jobs.
A HDD saved job contains the setting information of the number of sets. You can change it as desired when recalling it.
The original HDD saved job remains as is even after it is recalled.
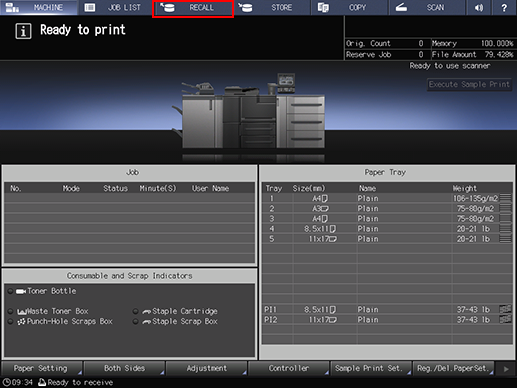
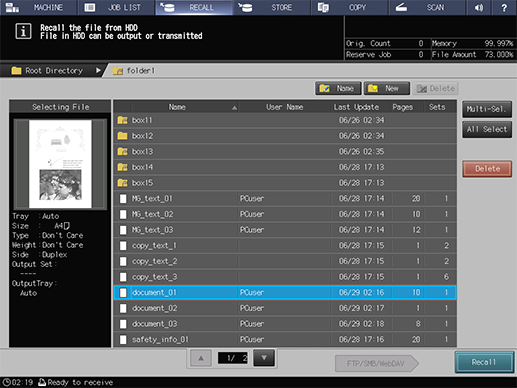
Press the [RECALL] tab to display the [Root Directory] screen on the [RECALL] screen.
Display the location to store a hold job.
Select the directory (root directory, folder, or user box) that contains the target HDD saved job. If the folder or User Box is password protected, enter the password.
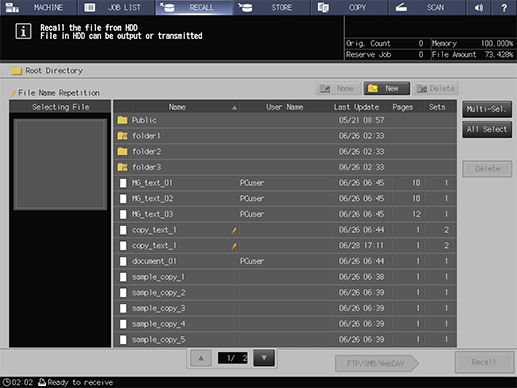
Select a hold job.
If the desired job is not found on the list, press [
] or [] to display that job
Pressing each title in the title row will sort the list in selected order.
For details about the icons displayed in the list, refer to Hold Job screen.
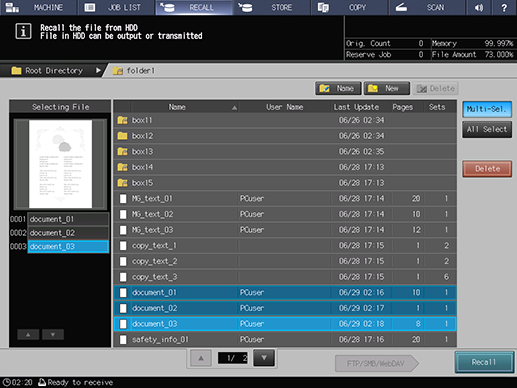
Press [Multi-Sel.] first to select multiple jobs.
Press [All Select] to select all jobs on the list. Pressing this key selects all jobs on the list, but [Multi-Sel.] appears highlighted instead.
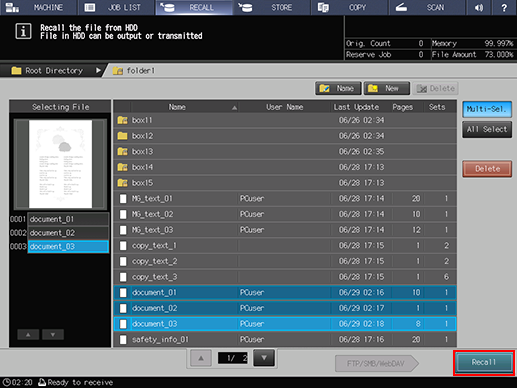
Press [RECALL].
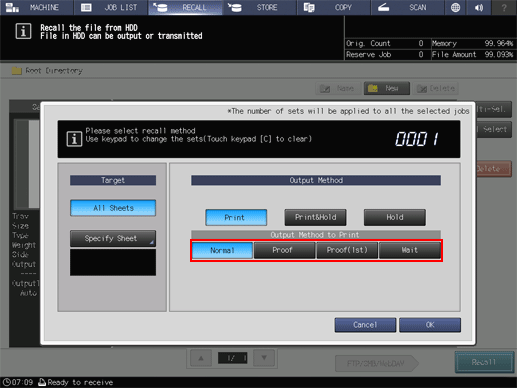
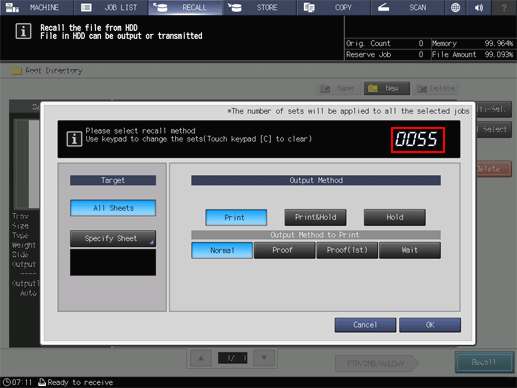
Select the recall mode.
Selecting [Print & Hold] performs job printing and holding simultaneously.
Selecting [Hold] holds a job without outputting it.
If [Print&Hold] or [Hold] is selected, [Specify Sheet] is not available.

If [Print&Hold] is selected, select the output method.
Selecting [Normal] prints data by the number of sets that is specified for the job.
Selecting [Proof] prints one set of data only to enable the print results to be viewed.
Selecting [Proof(1st)] prints only the first page to enable the print results to be viewed.
Selecting [Wait] sets the job to the output stop state as a reserved job.
Use the keypad on the control panel to enter the print quantity.
Although the number of sets specified for the job is displayed, you can change it for output purposes.
Enter the value using the keypad on the control panel. Available range is from 1 to 9,999.
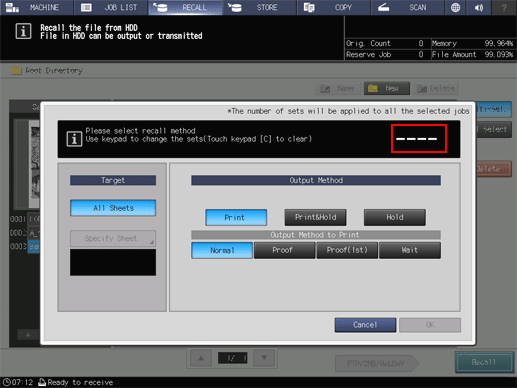
If multiple jobs are selected, the number of sets is displayed as [ - - - -]. You cannot output until you input the number of copies. Although the number of sets that you have entered is reflected to the all selected jobs, it does not overwrite job information regarding print quantity.
Press [OK] on the dialog.
Recall a job using the methods specified in steps 5, 6 and 7.
The specified HDD saved job is recalled and saved as a hold job.