
Outputting the Density Balance Chart
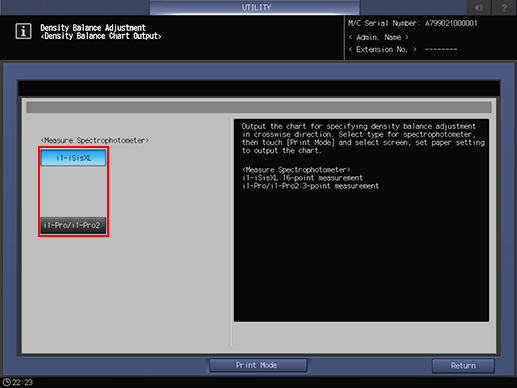
There are two types of spectrophotometers to read the chart.
i1-iSisXL
i1-Pro/i1-Pro2Output a chart to which the screen type that has been set by the machine was applied.
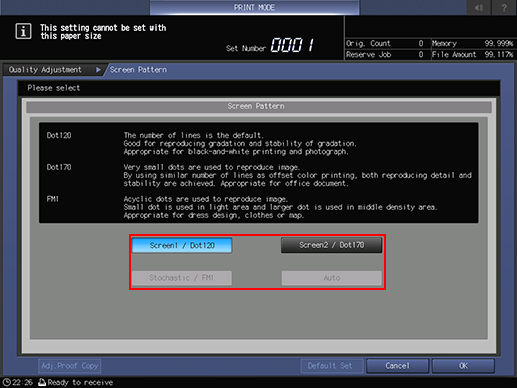
Before outputting the chart, an appropriate screen and paper must be selected.

[Stochastic], however, cannot be selected to output a chart.

The screen type can be changed in UTILITY. For details, refer to Custom Screen: Selecting the Screen Type.
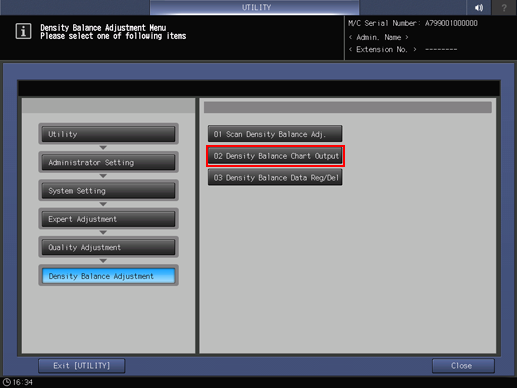
Follow the procedure on Administrator Setting to display the [Administrator Setting Menu] screen.
Press [System Setting] on the [Administrator Setting Menu] screen, and then press [Expert Adjustment], [Quality Adjustment], [Density Balance Adjustment], and [Density Balance Chart Output] in sequence.
Select the desired spectrophotometer, and press [Print Mode].
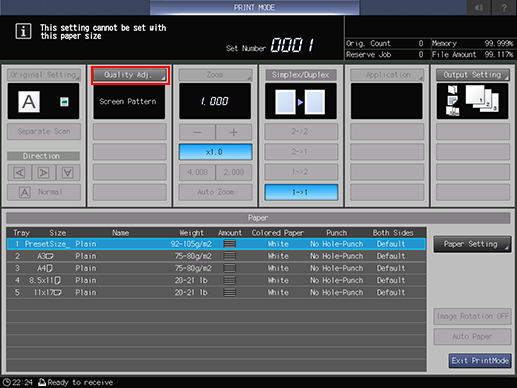
Press [Quality Adj.].
Press [
 ] on the right side of [Screen Pattern] to display the desired screen.
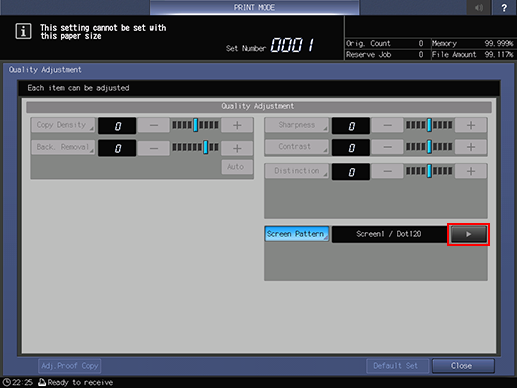
If necessary, you can press [Screen Pattern] to display the [Screen Pattern] screen and select any screen. Select a screen, and press [OK].
Press [Close] on the [Quality Adjustment] screen.
Select a paper size for the chart.
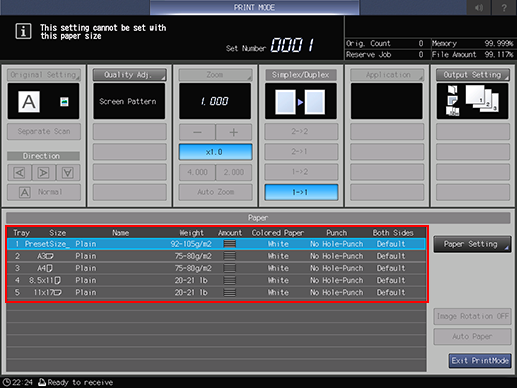
Load 12
 18
18  , SRA3 , 11 17 , or A3 paper in a tray, then select that tray.
Press Start on the control panel.
A test chart is printed.
Press [Exit PrintMode].
The screen returns to the [Density Balance Chart Output] screen.
Press [Return].
The screen returns to the [Density Balance Adjustment Menu] screen.