
Gap Adj. Between LPH Chips: Correcting the Gap between LPH Chips
Adjust the gap (39 points) between LPH chips.
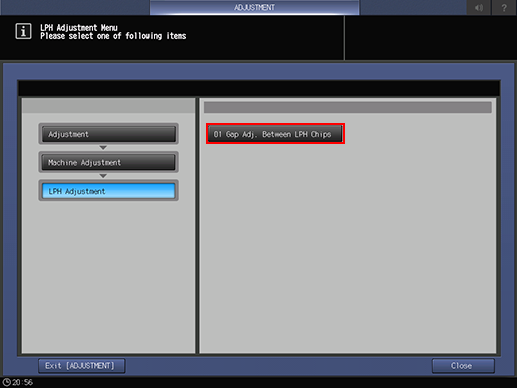
Press [Adjustment] on the [MACHINE] screen to display the [Adjustment Menu] screen.
Press [Machine Adjustment], [LPH Adjustment], and [Gap Adj. Between LPH Chips] in sequence.
In [Select Test Pattern], select either [Dark Gray] or [Light Gray].
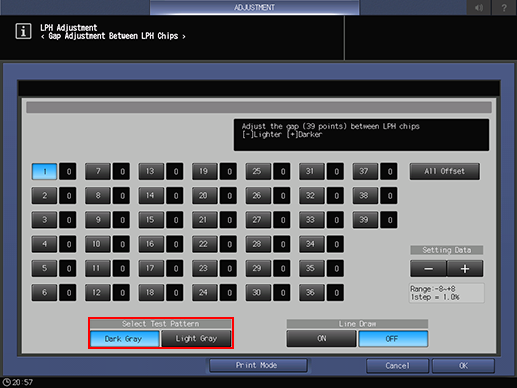
Select [Dark Gray] if output contains white lines, or [Light Gray] if output contains black lines for ease of identification.
Select [OFF] from [Line Draw] and press [Print Mode].
Load A4
 paper or 8.5
  11 paper, then select that tray.
Press Start on the control panel.
A sample pattern will be output.
Press [Exit PrintMode] to return to the [Gap Adj. Between LPH Chips] screen.
Select [ON] from [Line Draw] and press [Print Mode].
In the same way as for step 5, select the tray that has A4
paper or 8.5 11 paper loaded.Press Start on the control panel.
A sample pattern will be output.
Press [Exit PrintMode] to return to the [Gap Adj. Between LPH Chips] screen.
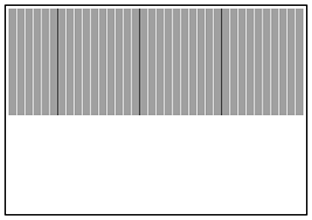
Compare the sample patterns output in step 6 and step 10 to identify the gap point to be corrected.
The patterns are drawn with white lines and black lines, and a black line represents a decuple of points.
Observe the white lines and black lines. The lines resulted from LPH should be drawn sharply. Focus on these sharp lines in order to identify the gap point.
The lines resulted from the process should be broad and blurred. Do not use such lines to identify the gap point.
On the [Gap Adjustment Between LPH Chips] Screen, select one from [1] to [39] point keys that corresponds to the identified gap point, then press [+] or [-] to enter setting data. To make universal adjustment, select [All Offset] and enter setting data.
Enter a [+] value for the case of white lines.
Enter a [-] value for the case of black lines.
Adjustment Range: ([Lighter]) -8 to +8 ([Darker]) (1 step = 1.0 %)
Too large adjustment value results in black lines, while too small value results in white lines.
Repeat steps 3 to 13 until the desired result is obtained.
Press [OK] to complete the setting.
To cancel the change, press [Cancel].
In each case, the screen returns to the [LPH Adjustment Menu] screen.