
Installing the PCL driver
Insert the Driver CD-ROM into the CD-ROM drive.
If the [User Account Control] window appears, click [Yes] or [Continue].
Make sure that the CD menu is displayed, and then go to Step 2.
If CD menu is not displayed, double-click [Autorun.exe] in the CD-ROM, and then go to Step 3.
Select [Install printers/MFPs] and select [PCL].
The printer driver installer starts.
Click [AGREE].
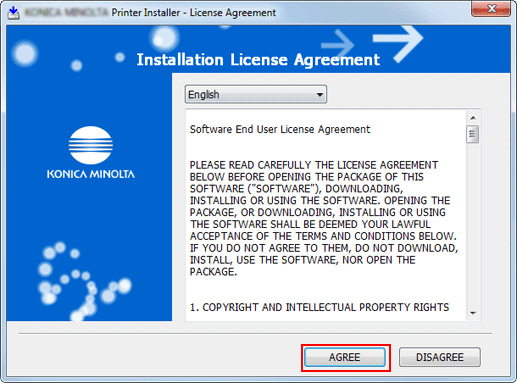
If you disagree, you will not be able to install the driver.
In the language display box, you can change the language used with the installer as required.
Select [Install printers/MFPs] and click [Next].

When Printers/MFPs are detected on both IPv4 and IPv6, you can specify [IPv4 Priority] or [IPv6 Priority].
Select this machine from the list, and click [Next].
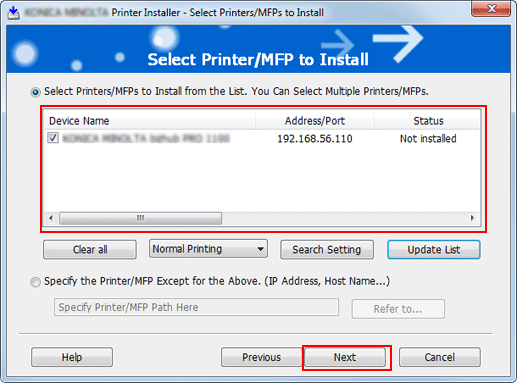
From among the connected printers/MFPs, the models corresponding to the printer driver appears in the list. If multiple models appears, check the IP address.
If the connection with this machine is not detected, no model appears in the list. In this case, select the [Specify the Printer/MFP Except for the Above. (IP Address, Host Name...)] at the lower part of the screen.
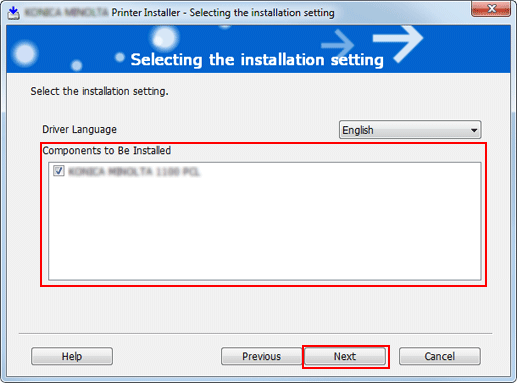
Select the component to be installed and click [Next].
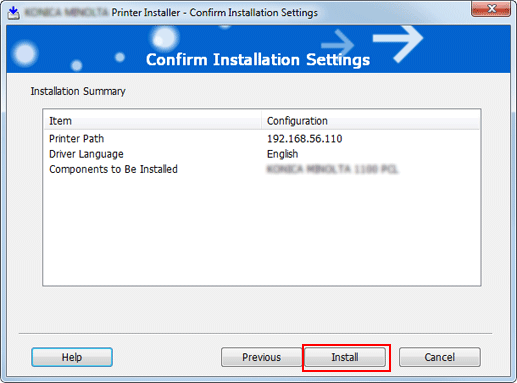
Confirm the installation summary and click [Install].
If the "Windows Security" dialog box is displayed during processing, click [Install].
Click [Finish].
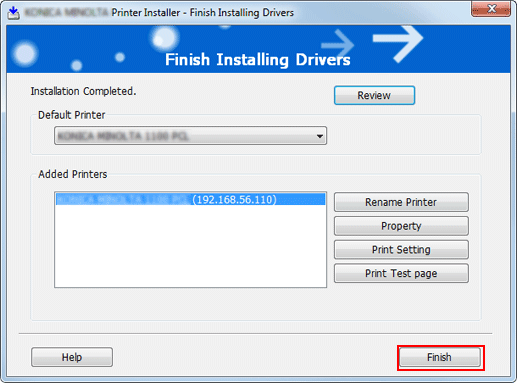
The installation is complete.
You can confirm the installed items and settings on [Installation Completed] screen.
[Review]
You can review the installed items and configuration.
[Rename Printer]
You can change the printer name.
[Property]
You can set the property of the printer.
[Print Setting]
You can open the [Properties] screen for the printer driver and specify several settings.
[Print Test page]
You can print test page.