Recalling a job from the HDD
Follow the procedure below to recall the hold job in the HDD.
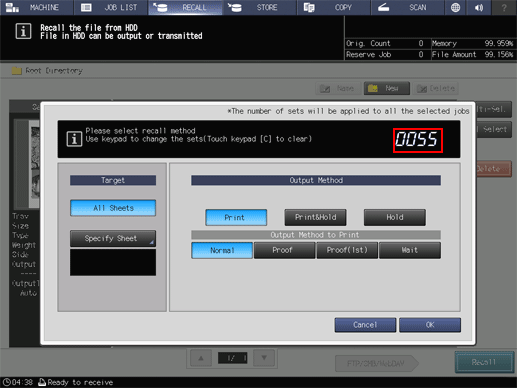
[RECALL] of the HDD saved job function allows you to print the job, hold the job, or print and hold the job at the same time. You can also select the output method when printing the job.
The stored job retains the information of specified print quantity, however, you can change it as desired when recalling a job.
Press the [RECALL] tab to display the [RECALL] screen.
The [Root Directory] screen of the [RECALL] screen is displayed.
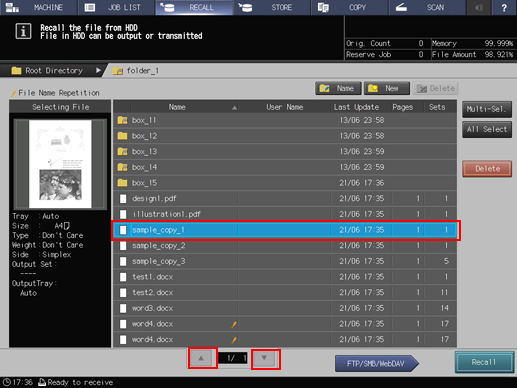
Display the directory including the job to be recalled.
Select the directory (root directory, folder, user box) of the HDD where the job is stored. If the folder or user box is password-protected, enter the password.
If data with the same file name exists, the
 mark appears on the right of the file name.
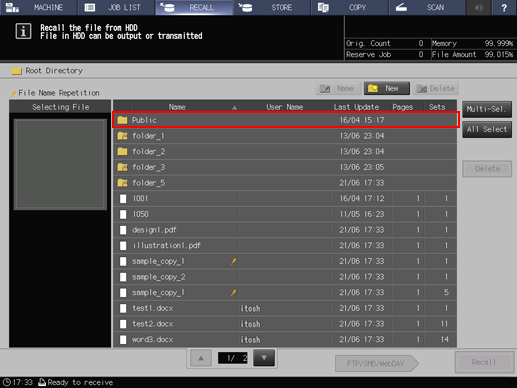
Select the job to be recalled.
Press the row of the desired job on the list.
If the desired job is not found on the list, press [
 ][
][ ] to display that job.
Pressing each title in the title row will sort the list in selected order.
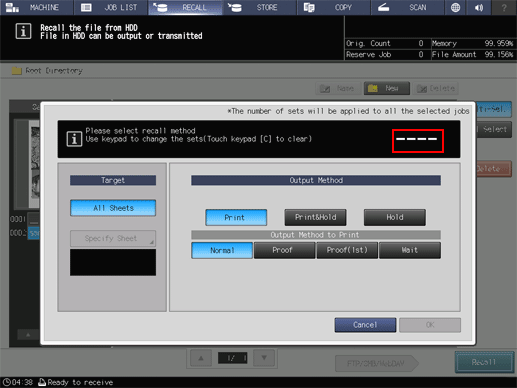
Press [Multi-Sel.] first to select multiple jobs.
Press [All Select] to select all jobs on the list. Pressing this key selects all jobs on the list, but [Multi-Sel.] appears highlighted instead.
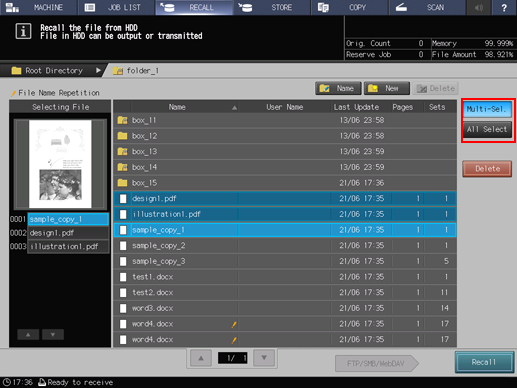
Press [Recall].
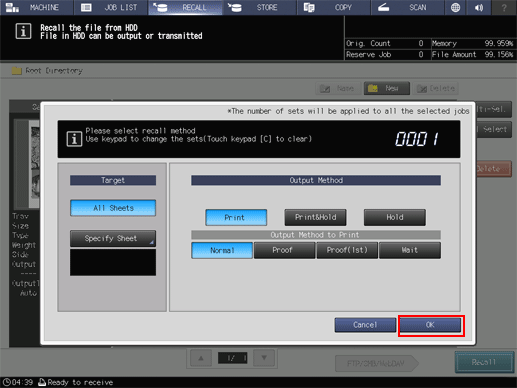
Select the recall mode.
Press [Print] to print.
Press [Print & Hold] to print and hold the job at the same time.
Press [Hold] to hold the job without printing.
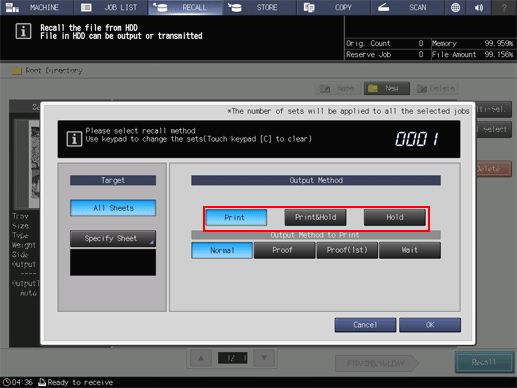
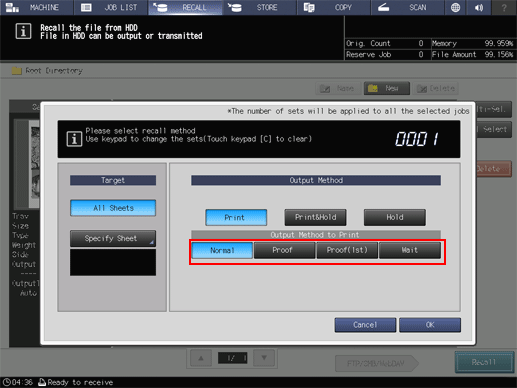
If [Print] or [Print & Hold] is selected, select the output method.
Selecting [Normal] prints data by the number of copies that is specified for the job.
Selecting [Proof] prints data by only one copy to check the output.
Selecting [Proof(1st)] only prints the first page to check the output.
Selecting [Wait] sets the job to the output stop state as a reserved job.
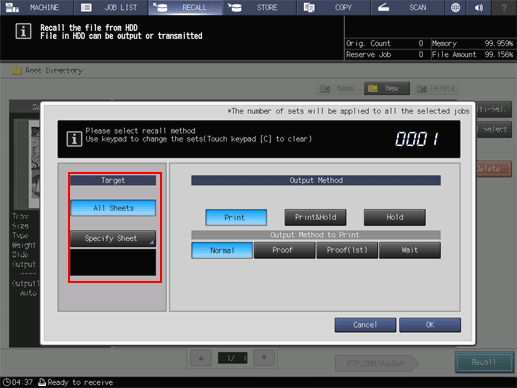
Select the desired output target.
Selecting [All Sheets] targets all sheets.
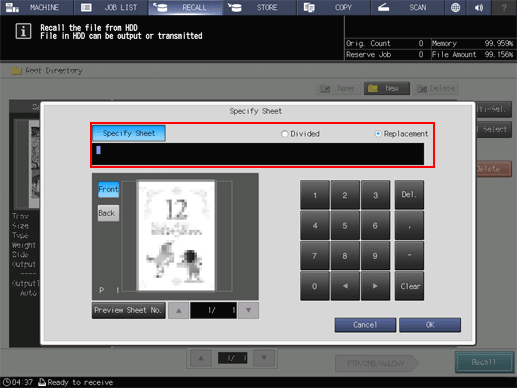
Selecting [Specify Sheet] allows you to specify the target sheet on the [Specify Sheet] screen. If multiple jobs are selected, [Specify Sheet] is not available.
Specify a sheet using a numeric value. To specify multiple sheets, delimit them using a comma (,) (example: 2,4,6). To use successive sheets, specify the range using a hyphen (-) (example: 2-5).
Select the method to output the specified sheet.
[Divided]:
Outputs the specified sheet while existing job tickets are held. Specifying [Page No.] in the [Stamp] performs re-assignment in the specified sheet.
[Replacement]:
Outputs the specified sheet to replace the output job with. [Staple], [Fold & Staple], and [Offset] are canceled. For [Creep Adjustment] of the [Booklet] and [Page No.] in the [Stamp], the setting values, which are defined when all sheets are output, are held.
Use the keypad on the control panel to enter the print quantity.
Although the number of copies specified for the job is displayed, you can change this number it for output. Even if the change is made here, the original number of copies specified for the job stored on the HDD remains unchanged.
Enter the value using the keypad on the control panel. Available range is from 1 to 9,999.
If multiple jobs are selected, the number of copies is displayed as [ - - - -]. You cannot output until you input the number of copies. Although the number of copies that you have entered is reflected to the all selected jobs, it does not overwrite job information concerning print quantity.
Press [OK] on the dialog.
Recall a job using the methods specified in step 5, step 6, and step 7.