
SNMP Setting
Click [SNMP Setting] on the menu of [Network] tab to display this screen.
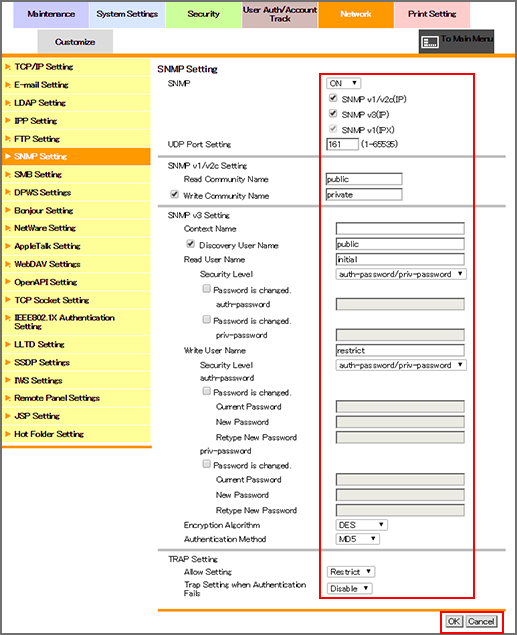
This screen allows you to configure the settings to acquire machine information or monitor the machine by using Simple Network Management Protocol (SNMP).
To use SNMP, select [ON] from the [SNMP Setting] drop-down list.
Select the checkbox of the version used for SNMP. Specify a UDP port as necessary.
If [SNMP v1/v2c] has been set, specify [Read Community Name] and [Write Community Name].
If [SNMP v3] has been set, specify the following items.
[Context Name]: Enter a context name (up to 63 one-byte characters).
[Discovery User Name]: Enter a discovery user name (up to 32 one-byte characters).
[Read User Name]: Enter a name of the read-only user (up to 32 one-byte characters).
[Security Level]: Select a security level of the read-only user.
[Write User Name]: Enter a name of the read and write user (up to 32 one-byte characters).
[Security Level]: Select a security level of the read and write user.
[Encryption Algorithm]: Select an encryption algorithm.
[Authentication Method]: Select an authentication method.
To allow the status alert of the machine by using the trap function of SNMP, select [Allow] from the [TRAP Permission Setting] drop-down list.
To send a trap when authentication fails, select [Enable] from the [TRAP set (auth. failure)] drop-down list.
Click [OK]. Clicking [Cancel] cancels the setting.
Click [OK] on the setting complete screen.