
Account Track Settings
Click [Account Track Settings] on the menu of [User Auth./Account Track] tab to display this page.
When [Account Track] is set to [OFF], the following screen is displayed.
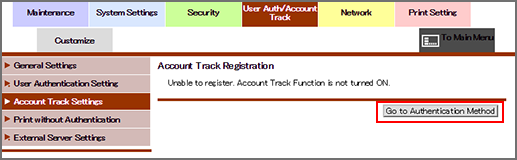
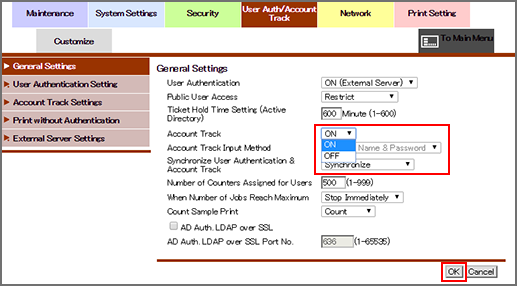
Click [Authentication Method Menu] to display the [Authentication Method] screen. To register an account for account track, specify [ON] for [Account Track].
You can register or delete an account for account track.
Account track registration
Click [New Registration] to register a new account, or click [Edit] for a desired account name to edit the data already registered.
Select a range of numbers from the [Search from numbers] drop-down list, then click [Go] to display the registration list of the selected range.

Enter the registration number.
You can enter the number in the range shown on the right.
If you are editing, the registration number for the selected account name is displayed. You cannot enter the value.
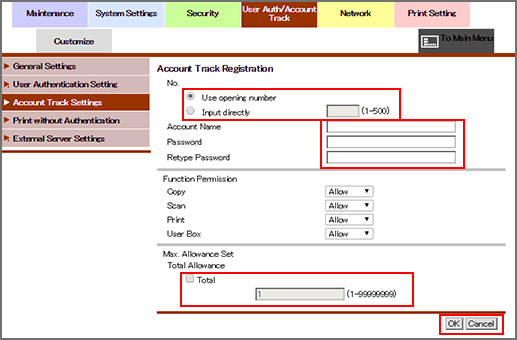
Enter the account name.
Up to 8 one-byte characters can be used.
If the [account track authentication method] in [Authentication Setting] is set to [Password Only], this item is dimmed.
Enter the password.
Up to 8 one-byte characters can be used. Enter the same password for [Retype Password].
Select the functions to be available and the maximum allowed for printing for the registered account.
Click [OK]. Clicking [Cancel] cancels the setting.
Click [OK] on the setting complete screen.
To delete an account
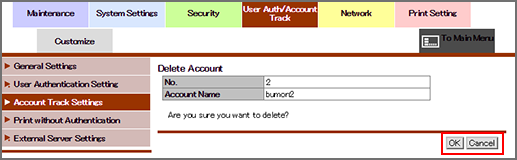
Click [Delete] for an account to be deleted.
Click [OK] on the confirmation screen. Click [Cancel] to cancel the deletion.
Click [OK] on the setting complete screen.