
Install Color Centro
Insert the installation CD-ROM into the CD-ROM drive of the computer.
Check that the installer starts, and then go to Step 2.
If the installer does not start, double-click [setup.exe] on the CD-ROM, and then go to Step 3.
Click [Administration Tools] - [Color Centro] - [Install].
If the [User Account Control] window is displayed, click [Yes].
Select a language, and then click [OK].

If .NET Framework 3.5 has not been installed on the computer, install it by following the instructions on the screen.
Click [Next].

The [License Agreement] screen is displayed.
Check the contents, then click [I accept the terms in the license agreement]. Click [Next].
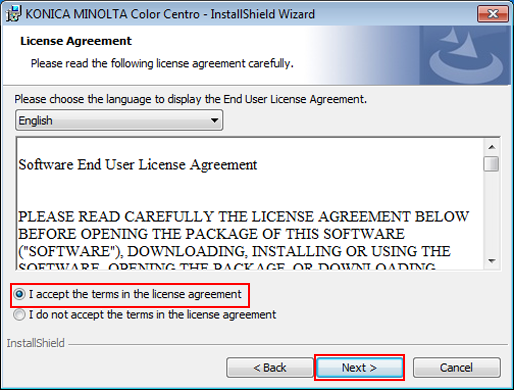
If you disagree, you will not be able to install Color Centro.
By selecting from the drop-down list, you can change the language of the license agreement.
Select the destination folder and click [Next].

By default, Color Centro is installed to one of the following locations.
32bit OS: C:\Program Files\KONICA MINOLTA\Color Centro
64bit OS: C:\Program Files (x86)\KONICA MINOLTA\Color Centro
If you want to change the destination folder, click [Change] and select the desired location on the displayed screen and click [OK].
Click [Install].

Click [Finish].

The installation is complete.
If you check [Create Shortcut on the Desktop] before clicking [Finish], a shortcut icon is created on the Desktop.
Readme for Color Centro is installed as well as Color Centro in the selected installation location.