Registering an overlay
Create an image to print a document over it (Superimposition), then register it in the computer or a public folder with [Overlay].

To [Create Shared Overlay File], select the [Use Shared Folder (Overlay Printing)] check box in the [Settings] tab in advance, then register a public folder to save an overlay in. For details on the [Settings] tab, refer to Settings.
Create a document to be registered as an overlay using the application software.
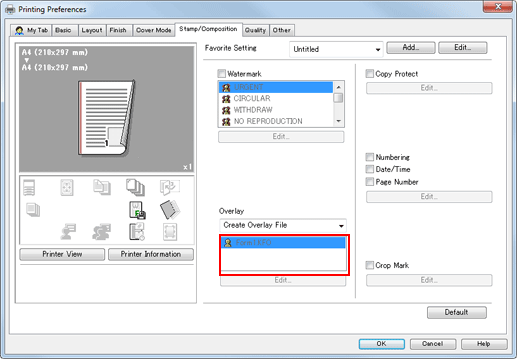
In [Overlay] of the [Stamp/Composition] tab, select [Create Overlay File] or [Create Shared Overlay File].

Click [OK] to start printing.
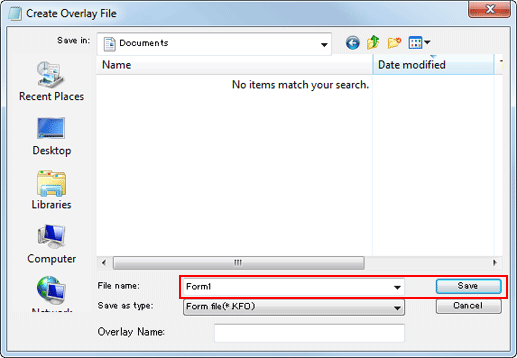
This displays the screen for saving the overlay file.
Enter the file name, then click [Save].
The document is registered as an overlay file.
Select [Overlay] of the [Stamp/Composition] tab, then check that the file name is displayed.