
Imaging
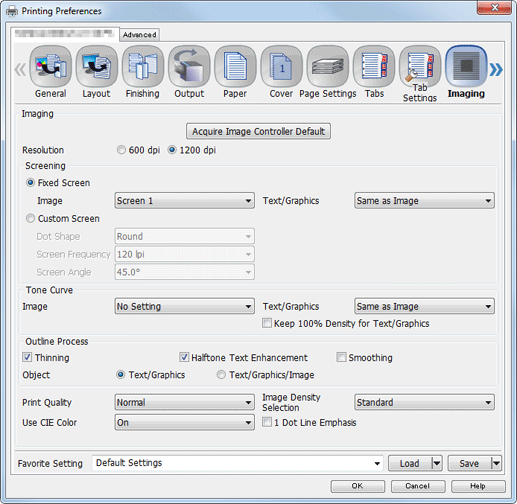
Function | Option | Description |
|---|---|---|
[Acquire Image Controller Default] | - | Acquires default information of the image controller. |
[Resolution] | [600 dpi], [1200 dpi] | Selects a resolution.
|
[Fixed Screen] - [Image] | [Screen 1], [Screen 2], [Stochastic] | The quality adjustments (*) set from the touch panel of the main body can be reflected to each of [Image] and [Text/Graphics].
|
[Fixed Screen] - [Text/Graphics] | [Screen1], [Screen2], [Same as Image] | |
[Custom Screen] - [Dot Shape] | [Simple Dot], [Inverted Simple Dot], [Double Dot], [Inverted Double Dot], [Cosine Dot], [Double], [Inverted Double], [Line], [Line X], [Line Y], [Round], [Ellipse], [Ellipse A], [Inverted Ellipse A], [Ellipse B], [Ellipse C], [Inverted Ellipse C], [Square], [Cross], [Rhomboid], [Diamond] | Select [Dot Shape] to set the shape of a print dot. For details about dot shape, refer to the printer driver help. Select [Screen Frequency] to set the number of halftone dots per inch. The unit is lpi (line per inch). Although the resolution increases as the number is larger, the quality of gradation becomes poorer. The default setting is 120 lpi. Select [Screen Angle] to set the angle against the vertical axis of each color to prevent moire. |
[Custom Screen] - [Screen Frequency] | [40 lpi] to [300 lpi] | |
[Custom Screen] - [Screen Angle] | [0.0°] to [172.5°] | |
[Tone Curve] - [Image] | [No Setting] | Select the tone curve acquired from the image controller. You can specify the tone curve settings using the "Color Centro" application. |
[Tone Curve] - [Text/Graphics] | [Same as Image], [Not Setting] | |
[Keep Text/Graphics Density 100%] | Off, On | Specify this option to output texts and graphics objects with the highest density of this machine regardless of the tone curve setting. |
[Thinning] | Off, On | Select this check box to control the boldness of the text or line images. This setting also has an effect on white characters on a colored background. This setting is available when [Fixed Screen] is selected. 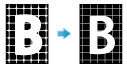 |
[Halftone Text Enhancement] | Off, On | Select this option to enhance outlines. |
[Smoothing] | Off, On | When turned on, you can smoothly print the outline of text with density of 100%, such as K=100%, and line images. The [Smoothing] setting is available when [Fixed Screen] is selected. |
[Object] | [Text/Graphics], [Text/Graphics/Image] | Select the type of object when any setting of [Outline Process] has been set. |
[Print Quality] | [Normal], [Draft Print], [Toner Save] | Specify the print density. [Draft Print] corresponds with [Image Density Selection] - [-4] and [Toner Print] corresponds with [-2]. |
[Image Density Selection] | [-5] to [-1], [Standard], [+1] | Select the print density. Move the slider toward plus to deepen the density and move the slider toward minus to lighten the density. |
[Use CIE Color] | Off, On | Uses a CIE color space (**). When [Use CIE Color] is turned On, the gradation will be better than Off since the printing is processed via the color space defined by CIE, the International Commission on Illumination. |
[1 Dot Line Emphasis] | Off, On | Turn [1 Dot Line Emphasis] on to emphasis an ultrafine line. |
*[Quality Adjustment] can be set from Utility Menu by selecting [Administrator Setting] - [System Setting] - [Expert Adjustment] - [Quality Adjustment] - [Custom Screen].
** Using a CIE color space may lighten the density of some colored text such as green or yellow text, but the text density can be adjusted together using the tone curve setting (text/graphics).