Making a Copy
Making a copy (basic operation flow)
This section explains the basic procedure to make a copy in Enlarge Display mode.
Load the original.

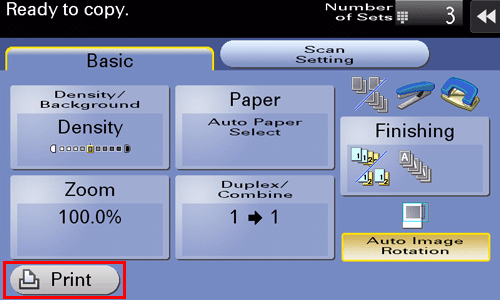
Tap [Copy].

Press the Enlarge Display key (default: Register key 1).

If necessary, configure copy settings.
 When specifying finishing for a copy job, refer to [Copy Settings (Basic)] .When specifying the original to be copied, refer to [Copy settings (Scan Setting)] .To reconfigure settings, press the Reset key.
If necessary, enter the number of copies using the Keypad.
To display the Keypad, tap the number of copies.Pressing the 10 Keypad key (default: Register key 3) displays the Keypad on the Touch Panel, enabling you to enter numeric values.To change the number of copies, tap [C] (Clear).
Press the Start key.

The original is scanned, and copying starts.
If you press the Stop key while scanning or printing an original, processing is stopped, and a list of inactive jobs is displayed. To cancel the operation, delete the stopped jobs from the list.If [Ready to accept another job.] appears while printing a job, you can scan the next original.
 Reference
 If necessary, you can change or specify the default values of Enlarge Display. For details, refer to [Configuring Enlarge Display operations] .
 Related setting (for the administrator)
- You can select whether to use Enlarge Display as the initial display of the Touch Panel (default: [No]). For details, refer to [Display Default Settings] .
Making a trial printing (proof copy)
Before beginning actual copying, do a single test copy and check it is acceptable.
When making a large number of copies, use the proof copy function to prevent a large number of copy errors from occurring.
Load the original.
Tap [Copy].
Press the Enlarge Display key (default: Register key 1).
If necessary, configure copy settings.
When specifying finishing for a copy job, refer to [Copy Settings (Basic)] .When specifying the original to be copied, refer to [Copy settings (Scan Setting)] .To reconfigure settings, press the Reset key.Enter the number of copies using the Keypad, then tap [OK].
To display the Keypad, tap the number of copies.Pressing the 10 Keypad key (default: Register key 3) displays the Keypad on the Touch Panel, enabling you to enter numeric values.To change the number of copies, tap [C] (Clear).Tap [Print] or press the Preview key (default: Register key 4).
 If the original is loaded into the ADF, one copy is made. Go to Step 10.If the original is loaded on the Original Glass, go to step 7.
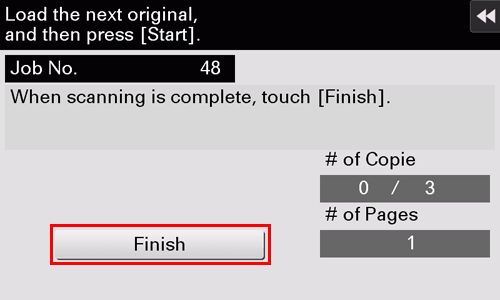
Load the next batch of the original, then press the Start key.
After all originals have been scanned, tap [Finish].
Press the Start key.
Copying begins for only one copy.
Check the proof copy.
To reconfigure copy settings or reenter the number of copies, press the Stop key.To cancel the operation, press the Reset key to cancel the setting.When making the remaining copies, tap [Print].
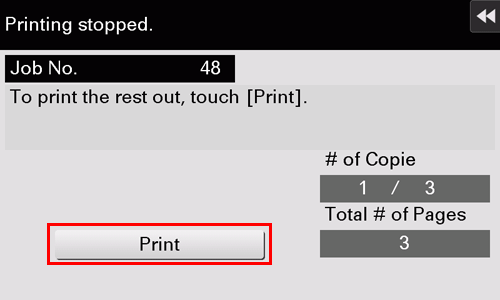
Copying begins for the remaining copies.