Registering User Authentication Information
To register user authentication information with Data Administrator, connect the authentication unit to the USB port of the computer, and also connect the computer to this machine via network.
 To use Data Administrator, set up the operating environment in advance. For details about the setup procedure, refer to [Setting Up the Operating Environment] .
Turn on the Main Power Switch of this machine.
Start Data Administrator, and import device information of this machine.
 Restart the procedure five or more seconds after connecting the authentication unit.For details about how to import device information, refer to the relevant Data Administrator manual.
In [Function selection], select [Authentication settings] - [User authentication settings], and then click [Add].

Select a user template, and click [OK].
For details about templates, refer to the relevant Data Administrator manual.
The User Registration screen appears.
Enter the user name and password, select the [AU-102] tab, then click [Register Auth. Info].
Up to two authentication information items can be registered for each user. For [Location of registration1] and [Location of registration2], register separate fingers. You should register two authentication information items in case you injure your finger.
Place your finger on the authentication unit to scan the finger vein pattern.
Place your finger straight so that your finger cushion lightly touches the hollow and protuberance part of the scanning section.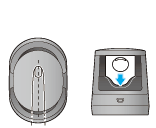 Scan a finger vein pattern three times. Place the same finger on the authentication unit again after scanning just once, and press [Start Reading].After scanning the finger vein patterns, place the same finger, then click [Authentication Test]. If the authentication test has succeeded, click [Register]. If the authentication test has failed, click [Reset] to repeat the scanning process.
Click [OK], and register authentication information of the next user.
After the registration of authentication information has been completed for all users, click [Export to the device].
When necessary, select a user name, and click [Edit] to change registered information.
Click [Write].
Data Administrator supports the batch copy function. When necessary, you can collectively write the registered authentication information to multiple devices.
When writing to this machine has finished, click [OK].
Disconnect the authentication unit from the USB port of the computer.
 NOTICE
 When connecting or disconnecting the USB cable, hold the plug. Otherwise, the machine may be damaged or a failure may occur.
Connect the authentication unit to the USB Port of this machine.
 NOTICE
- When connecting or disconnecting the USB cable, hold the plug. Otherwise, the machine may be damaged or a failure may occur.
Restart this machine.
NOTICE- When restarting this machine, turn the Main Power Switch off and on again after 10 or more seconds have passed. Not doing so may result in an operation failure.